安装前的确认工作
(一)硬件要求
DWF应用开发平台对硬件要求如下(空缺内容表示没有最低要求,但是需要根据项目的性能要求指定):DWF应用开发平台对硬件要求如下(空缺内容表示没有最低要求,但是需要根据项目的性能要求指定):
类型 | 最小配置 | 推荐配置 | 备注 |
|---|
| CPU | 4 core |
|
|
| 内存 | 8 GB |
|
|
| 磁盘 |
|
|
|
| 操作系统 | Ubuntu 发行版本18.04 Centos 发行版本7.6 |
|
|
| 网络 | 千兆网络 |
根据实际,可采用数据库服务器+应用服务器模式来部署。
(二)浏览器要求
DWF应用开发平台对浏览器要求如下。
...
source /ets/profile
(4)验证maven
mvn -v

3.6 安装平台应用服务器
...
(七)安装平台应用服务器
(1)上传平台搭建所需文件:
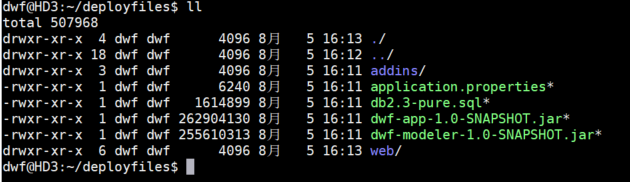
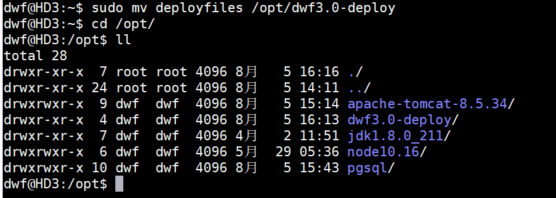
sudo mv deployfiles /opt/dwf3.0-deploy (移动dwf安装文件到opt下)
3.6.2 将war包移动到tomcat下(2)将war包移动到tomcat下
cd /opt/dwf3.0-deploy/web/ (跳转至dwf安装文件夹)
...
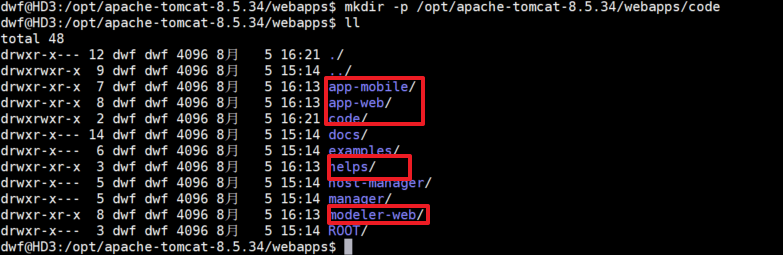
mkdir -p /opt/apache-tomcat/webapps/code (在tomcat下创建超级控件保存代码文件夹)
3.6.3 修改配置文件application.(3)修改配置文件application.properties内容
vim application.properties [各段用途参考:配置文件的格式说明]
spring.jpa.hibernate.ddl-auto=update
datasource.ip=127.0.0.1
datasource.port=5432
datasource.database=dataway
spring.datasource.url=jdbc:postgresql://127.0.0.1:5432/dataway?autosave=conservative
spring.datasource.username=postgres
spring.datasource.password=123456 spring.mvc.throw-exception-if-no-handler-found=true
spring.jpa.hibernate.naming.implicit-strategy=org.hibernate.boot.model.naming.ImplicitNamingStrategyLegacyJpaImpl
spring.jpa.hibernate.naming.physical-strategy=org.hibernate.boot.model.naming.PhysicalNamingStrategyStandardImpl
spring.jpa.properties.hibernate.dialect=org.hibernate.dialect.PostgreSQLDialect
spring.jpa.properties.hibernate.temp.use_jdbc_metadata_defaults=true
spring.jpa.properties.hibernate.jdbc.lob.non_contextual_creation=true
spring.servlet.multipart.max-file-size=1000MB
spring.servlet.multipart.max-request-size=1000MB
spring.jackson.default-property-inclusion=non_null # log
logging.level.io.swagger.models.parameters : ERROR
logging.config=classpath:logback-spring.xml
logHome=/opt/dwf3.0-deploy/log
scriptLogPrefix=script
print-rest-invoke-log=true # swagger host配置
swagger.host.app=
swagger.host.modeler=
swagger.host.monitor= # Custom properties
admin.name=admin
modeller.name=modeller
admin.password=123456
modeller.password=123456 # auth
auth.provider=edu.thss.platform.security.jwt.JwtAuthenticationProvider
auth.tokenprocessor=edu.thss.platform.security.jwt.JwtTokenProcessorImpl
#auth.provider=edu.thss.platform.security.tianyuan.TianYuanAuthenticationProvider
#auth.tokenprocessor=edu.thss.platform.security.tianyuan.TianYuanTokenProcessorImpl
auth.params.username=username
auth.params.password=password port=5432
password=123456
host=127.0.0.1
dbName=dataway
userName=postgres
addinPath=/opt/dwf3.0-deploy/dwf_sdk/assemble/addins
staticPrefix=http://127.0.0.1:8180/static
staticPath=/opt/dwf3.0-deploy/static
tomcatPath=/opt/apache-tomcat
shPath=/opt/dwf3.0-deploy/dwf_sdk/assemble/addins/server.py
logPath=/opt/dwf3.0-deploy
ipList="localhost;127.0.0.1;127.0.1.1;dwf;192.168.10.81;192.168.10.92"
codePath=/opt/apache-tomcat/webapps/code
nodePath=/opt/dwf3.0-deploy/dwf_sdk/assemble/addins/single
scriptPath=/opt/dwf3.0-deploy/dwf_sdk/assemble/addins/handle.py
partPath=/opt/dwf3.0-deploy/dwf_sdk/parts
sdkPath=/opt/dwf3.0-deploy/dwf_sdk/sdk
assembleLogPath=/opt/dwf3.0-deploy/dwf_sdk/assemble/log
tmpPath=/opt/dwf3.0-deploy/_tmp #local file data model plugin
data-model.plugin.repository.path=/opt/dwf3.0-deploy/file-repository
data-model.plugin.iotdb.ip=127.0.0.1
data-model.plugin.iotdb.port=6667
data-model.plugin.iotdb.username=root
data-model.plugin.iotdb.password=root # external configs (should start with "external.appConfig.")
external.appConfig.demoKey=demoValue
external.appConfig.demoKey.with.dots=value
external.appConfig.maxFileSizeKb=512000
external.appConfig.roleGroup= #-----------------------------------------------
# Cloud iBPM build time data storage (repository).
# Configuration: MySQL
# jdbc driver package installed.
db.product=Postgresql
db.jdbc.driverClassName=org.postgresql.Driver
# local host
# 初始化数据库连接为2
db.jdbc.initialSize=10
# 超时等待时间以毫秒为单位 60000毫秒/1000等于60秒
db.jdbc.maxWait=10000
# 最大连接数量
db.jdbc.maxActive=10
# 最大空闲连接数
db.jdbc.maxIdle=10
# 最小空闲连接数
db.jdbc.minIdle=3
# 是否在自动回收超时连接的时候打印连接的超时错误
db.jdbc.logAbandoned=true
# 是否自动回收超时连接
db.jdbc.removeAbandoned=true
# 超时时间(以秒数为单位)
db.jdbc.removeAbandonedTimeout=10
db.jdbc.poolPreparedStatements=true
db.jdbc.testOnBorrow=true
# db.jdbc.validationQuery=SELECT 1 FROM DUAL
db.jdbc.validationQuery=select version() # Cloud iBPM file storage.
# win: files are stored in hard disk on Windows server;
# linux: files are stored in hard disk on Linux server;
# amazon: files are stored on AWS S3;
# ali: files are stored on Ali cloud;
filestorage.type=win
# if storage type is win, files will be stored in C:/CloudiBPM/ by default;
# if storage type is linux, files will be stored in /var/www/CloudiBPM/ by default;
# if storage type is amazon, files will be stored in a bucket CloudiBPM/ on S3 by default;
# if storage type is ali, files will be stored in ???? by default;
linux.filestorage.lib=/home/cdh/xq/org
windows.filestorage.lib=D:/data/org
aliyun.filestorage.lib=S3
# external name list, format: extnames=jar;rar;zip;war; etc.
extnames=jar;properties;xml;txt; #----------------------------------------
# administrator company ID, e.g., Xuan QI Company ID
admin.corp.id=00000000000001R #----------------------------------------
# server entity ID cache
server.cache.entityId.size=200
server.cache.entityCode.size=10
server.cache.entityVersion.size=5
# server log pool cache
server.cache.log.batchSave.size=1 #-----------------------------------------
# File server info
#file.server.domainname=http://localhost:8080/file/
file.server.domainname=http://101.200.154.42:8080/file/
# API server info
api.server.domainname=http://192.168.1.81:6060
#api.server.domainname=http://localhost:6060
#api.server.domainname=http://localhost:8088/api/ # 1: standalone;
# 2: private cloud;
# 3: public cloud;
xq.product.pversion=1 # auth
dwf.cache.org.tree = false |
3.6.4 创建服务启动脚本start(4)创建服务启动脚本start.sh并执行
vi start.sh
复制以下内容
...
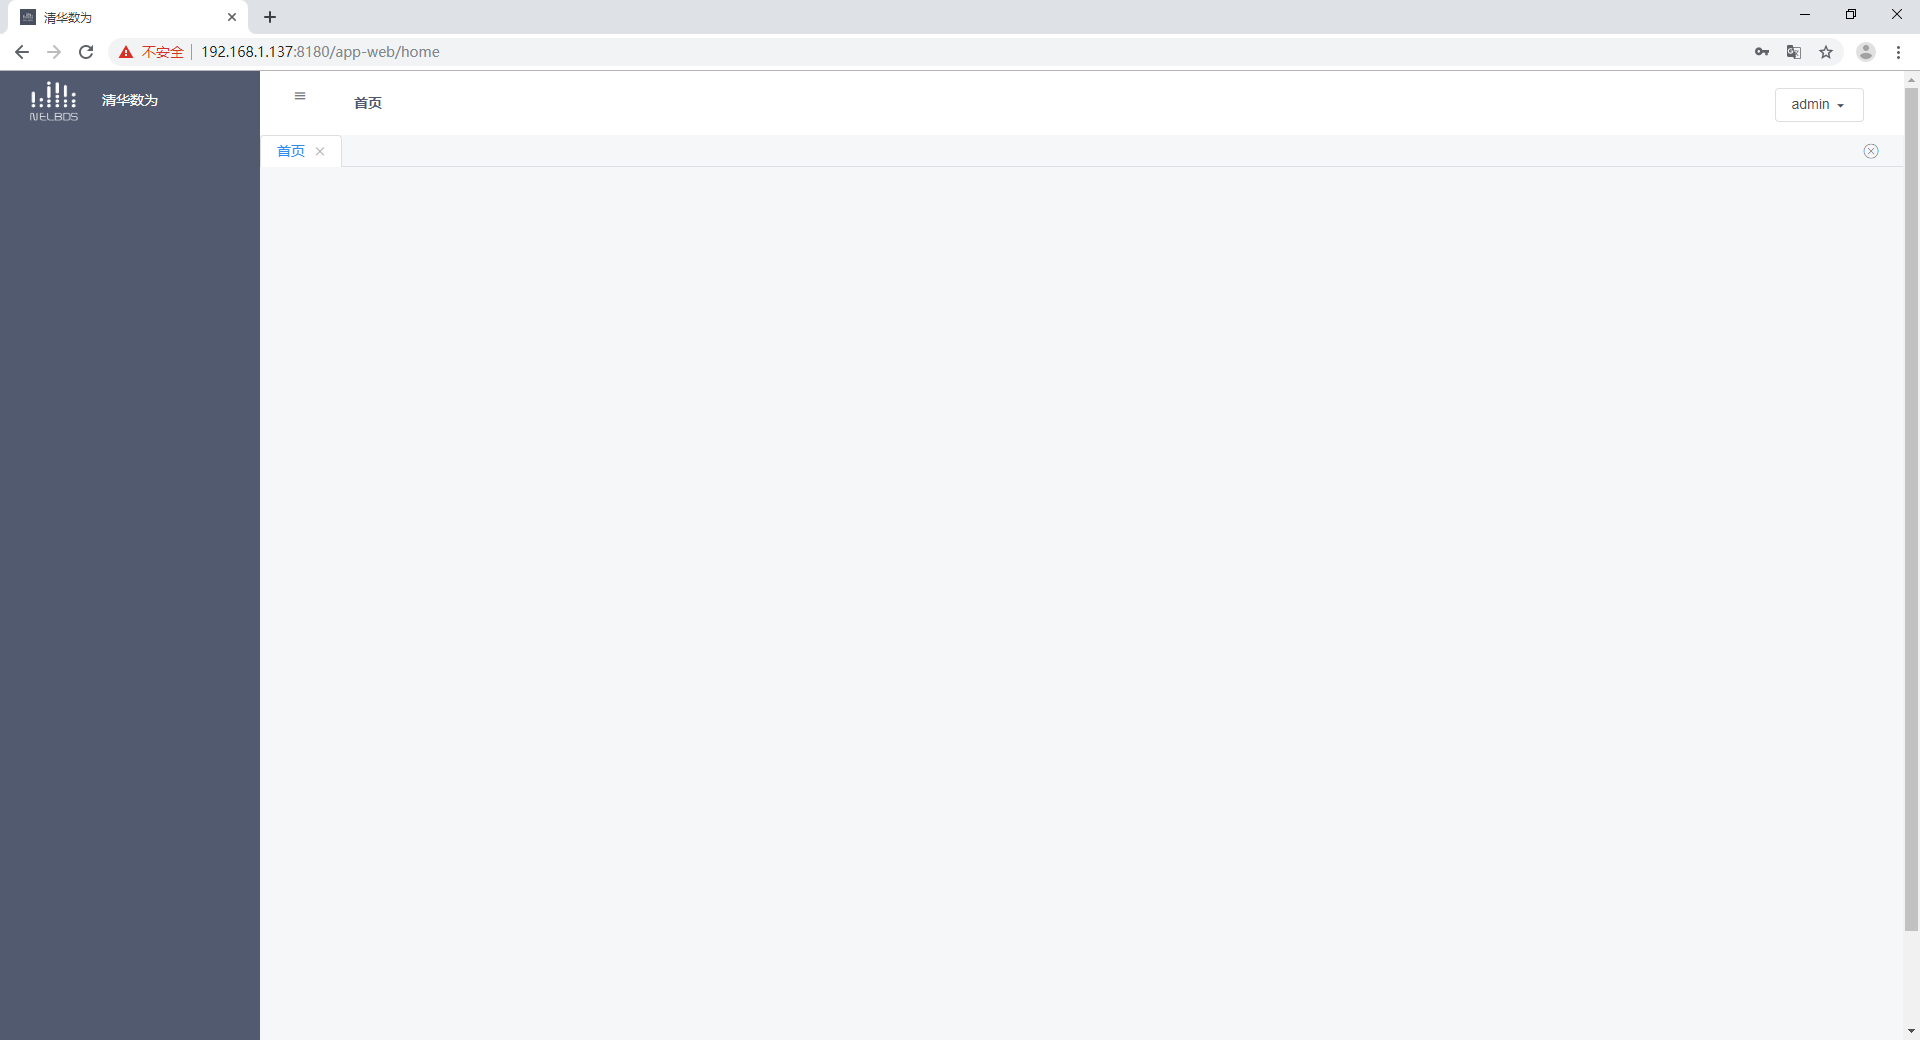
http://192.168.1.137:8180/app-web
...
服务地址
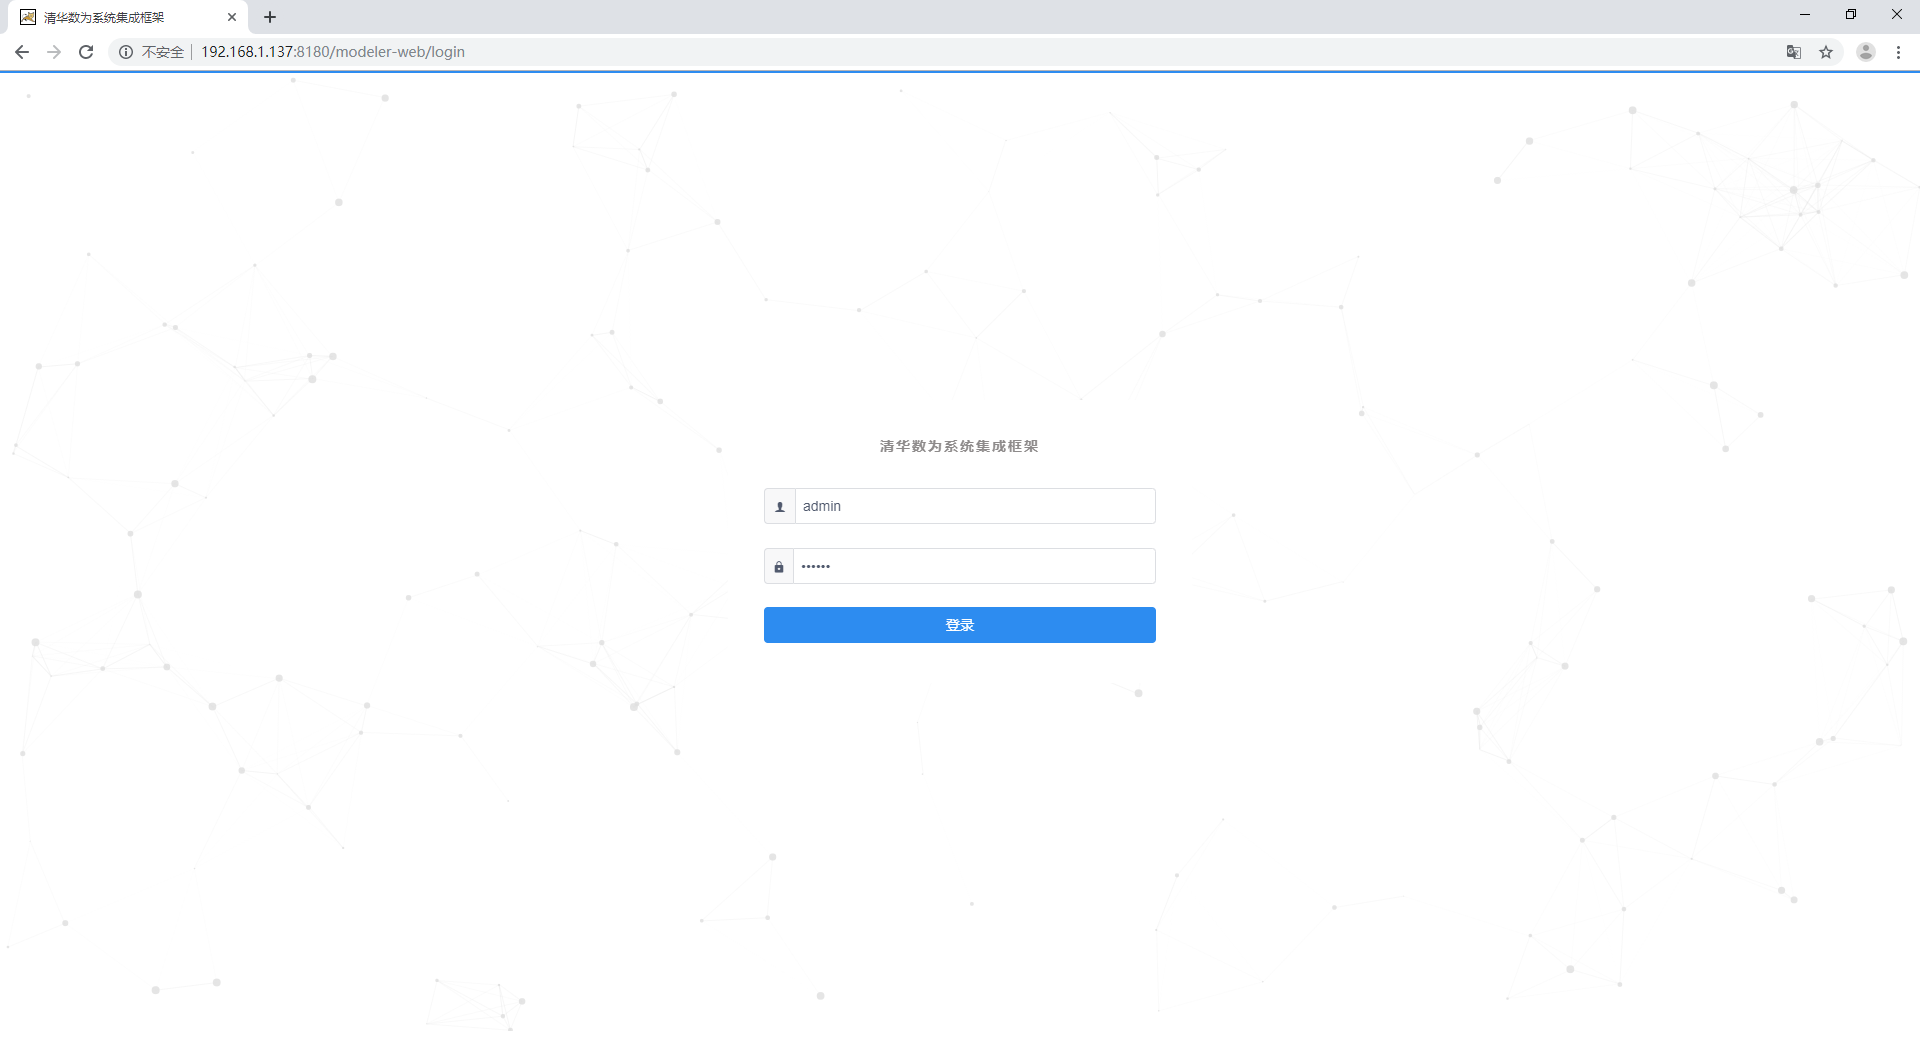
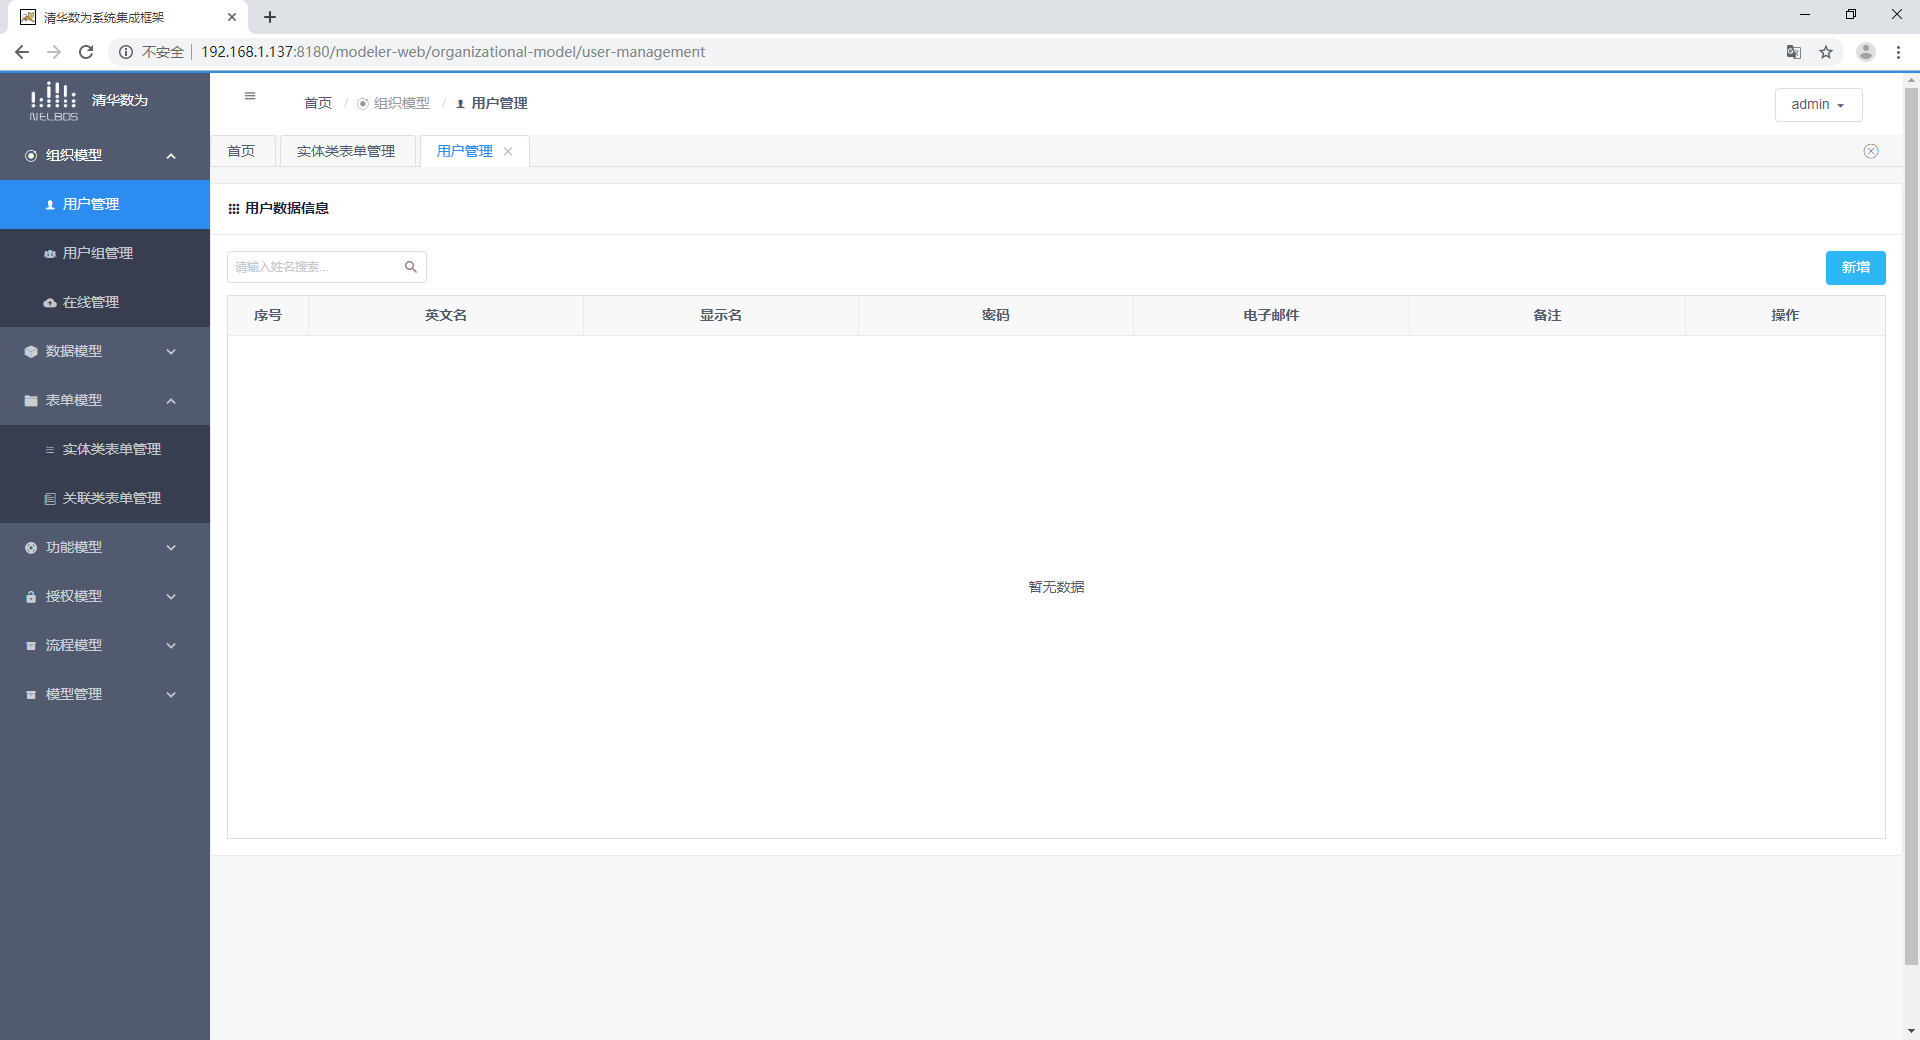
(一)Modeler简介
Web地址:http:[IP]:[Port]/modeler-web
...
简要说明:modeler-web是建模工具,提供组织模型、数据模型、表单模型、功能模型和权限模型等模型的编辑能力。
...
(二)App for PC简介
Web地址:http:[IP]:[Port]/app-web
...
简要说明:app-web是在PC端提供解释模型的应用支撑引擎,包括:认证引擎,对象管理框架,表单引擎,主界面引擎和规则引擎等。
...
(三)平台系统主界面说明
modeler-web: http://192.168.1.137:8180/modeler-web
...
app-web: http://192.168.1.137:8180/app-web
5 其它
5.1 服务分布部署的几种方案建议
5.2 数据库定期备份说明
5.3 可能的问题与解决
...
问题现象
...
可能原因
...
解决方案
5.4 一键部署脚本
为方便用户快速安装,系统包含一键部署脚本。用户仅需准备刚刚安装完毕Ubuntu 18.04的裸系统,设置IP和添加用户dwfF即可。
Step1:通过以下连接下载stetup.sh、setupfiles.tar.gz文件。需单独邀请发送
Step2:将以上两个文件上传到新安装的服务器。
 Image Removed
Step3:变更setup.sh文件为可执行。并运行./setup.sh。
以上脚本成功运行后就会创建新的DWF应用平台。
 Image Removed
用户可按照以下方式进行验证:
Modeler相关服务:
前端服务Web地址 : http://[IP]:8180/modeler-web
后端接口Swagger地址 : http://[IP]:6060/swagger-ui.html
app相关服务:
前端服务Web地址 : http://[IP]:8180/app-web
后端接口Swagger地址 : http://[IP]:9090/swagger-ui.html
以上验证通过即可正常使用。
相关下载
DWF 基础软件下载
链接: https://pan.baidu.com/s/1qj53HqZdqpPR9W-eSQlSxA 密码: nth2
...